Submitted by hosting on
So you just installed OBM, congratulations! Now, what next?
The following assumes that you installed all OBM components on the same machine (e.g., by installing the *obm-full* package).
### Connecting to your new OBM instance
* Open a browser to **https://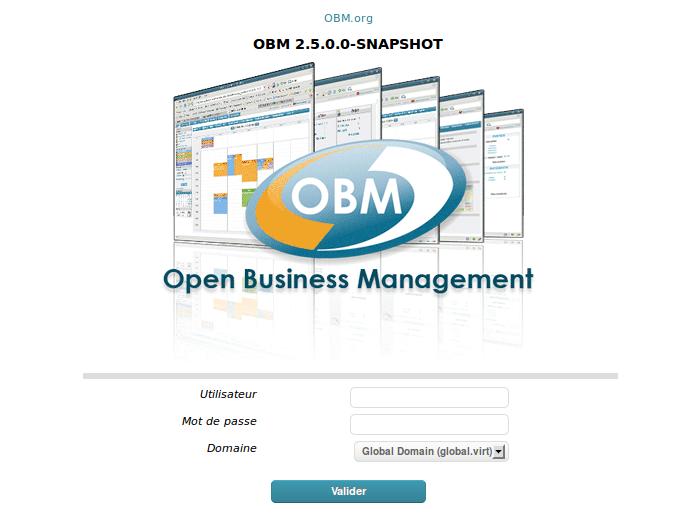
* Enter login **admin0**
* Enter password **admin**
* Press *Enter* or click *Submit*
* You're now logged in as user *admin0* and you can start configuring your OBM instance.
### Create your first Host
* Got to *Users* (top menu) > *Hosts*.
* Click *New* to create a host. You should see something like this: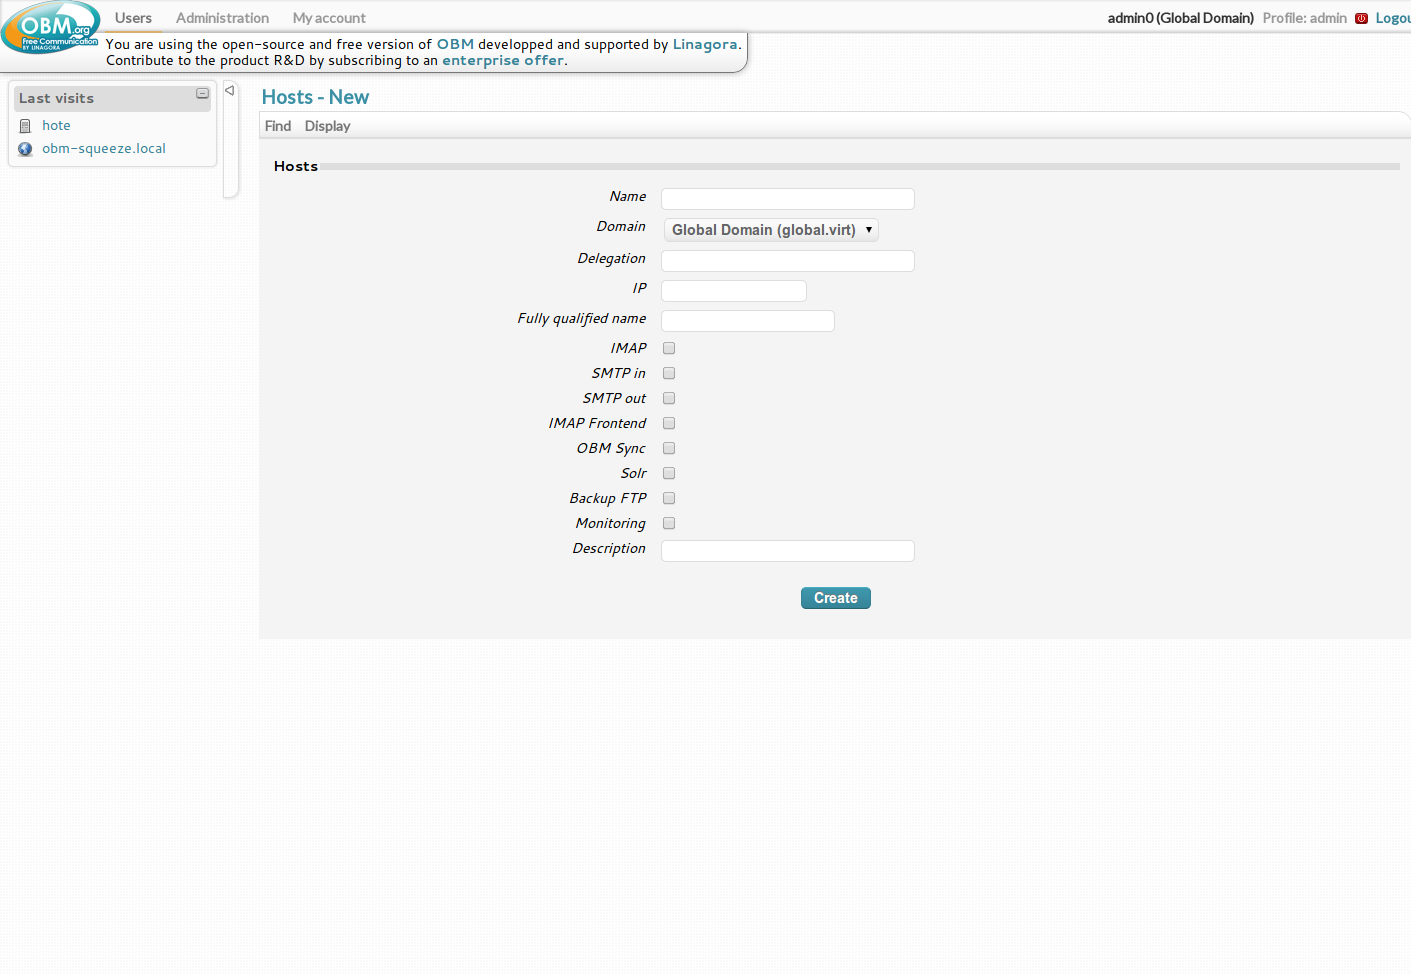
* Type **Local** in the *Name* field.
* Type **127.0.0.1** in the *IP* field.
* Type **local.global.virt** in the *Fully qualified name* field (the fully qualified name is simply *[name].[domain name]* in lowercase).
* Tick the following check boxes: *IMAP*, *SMTP In*, *SMTP Out*, *IMAP Frontend*, *OBM Sync*, *Solr*; *LDAP* and *Monitoring*.
* **New in 3.1.0** : Tick the new Imap Archive to use the new module ([more detail](http://docs.obm.org/obm-imap-archive/gettingStarted.html)).
This screenshot shows the host creation form with all fields set: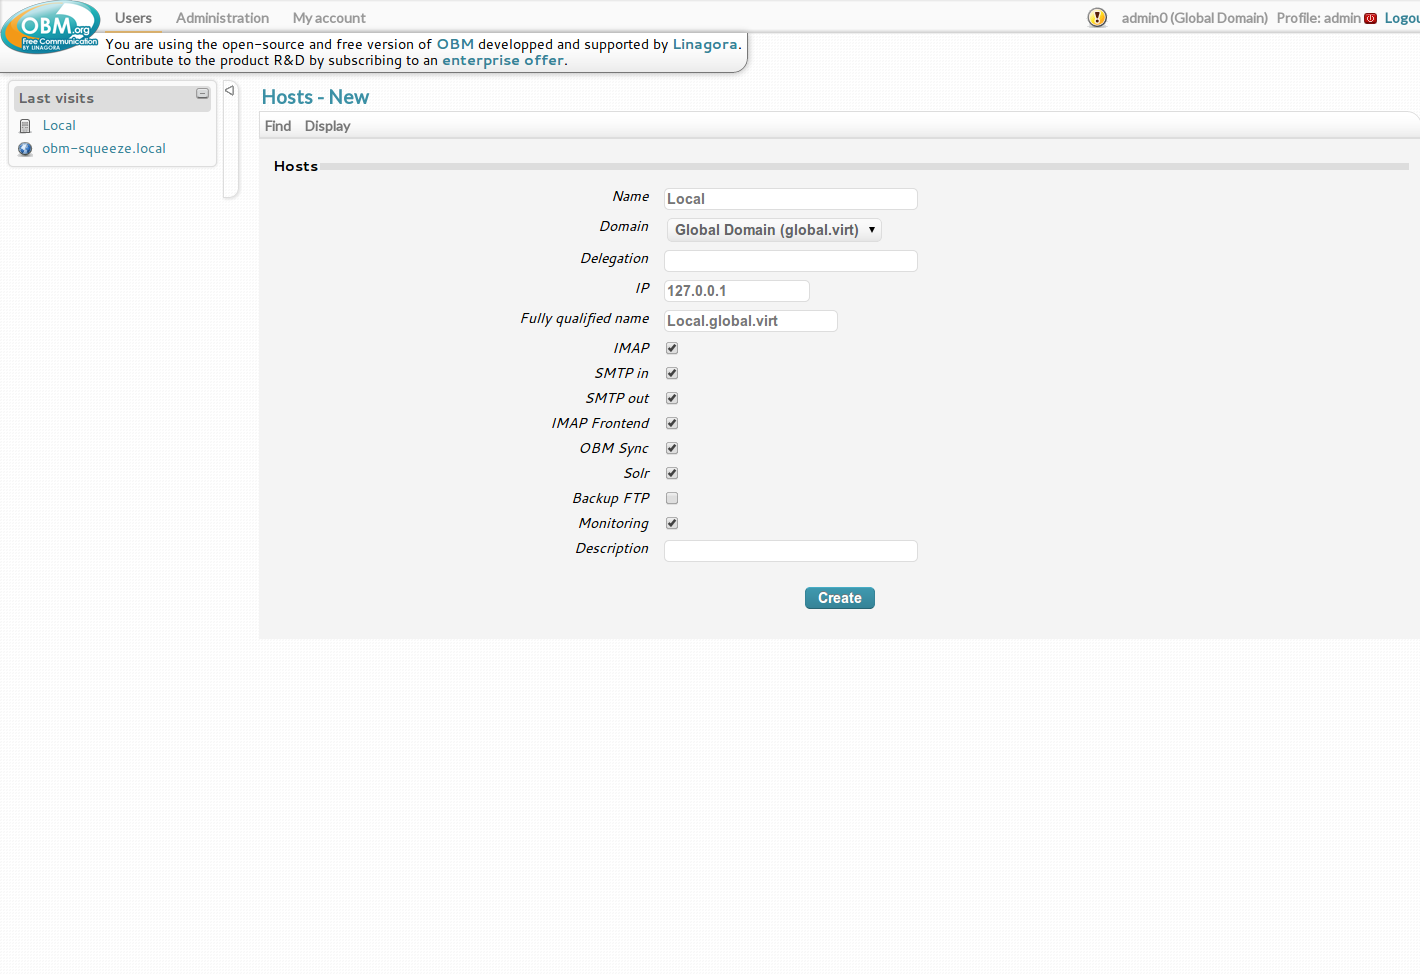
* Click *Create*.
### Create your first Domain
* Go to *Administration* > *Domains*.
* Click *New* to create a domain. You should see something like this:
* Type **local.global.virt** in the *Label* field.
* Type **local.global.virt** in the *Description* field.
* Type **local.global.virt** in the *Domain Name* field.
* Select the **Local** host in the following locations: *SMTP Out*, *IMAP*, *SMTP In*, *IMAP Frontend Servers*, *OBM Sync*, *Indexing Servers* and *LDAP*. This screenshot shows the host creation form with all fields set: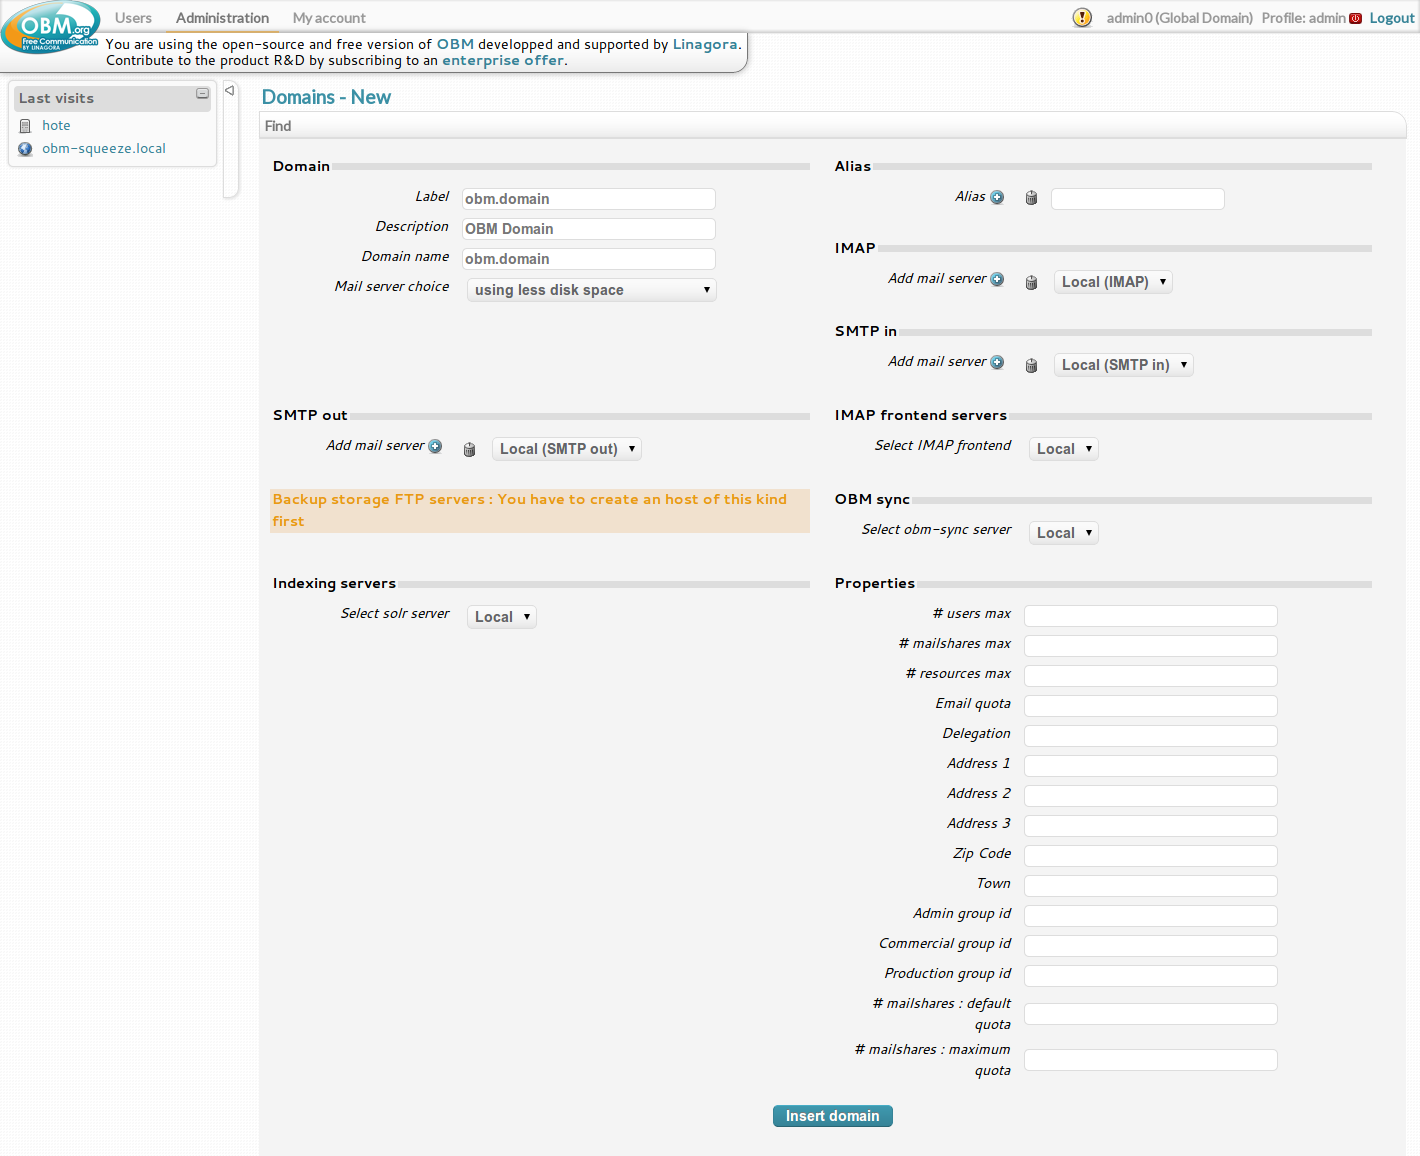
* Click *Insert Domain*.
### Create an administrator user for the domain
* Go to *Users* > *Users*.
* Click *New* to create a new user. You should see something like: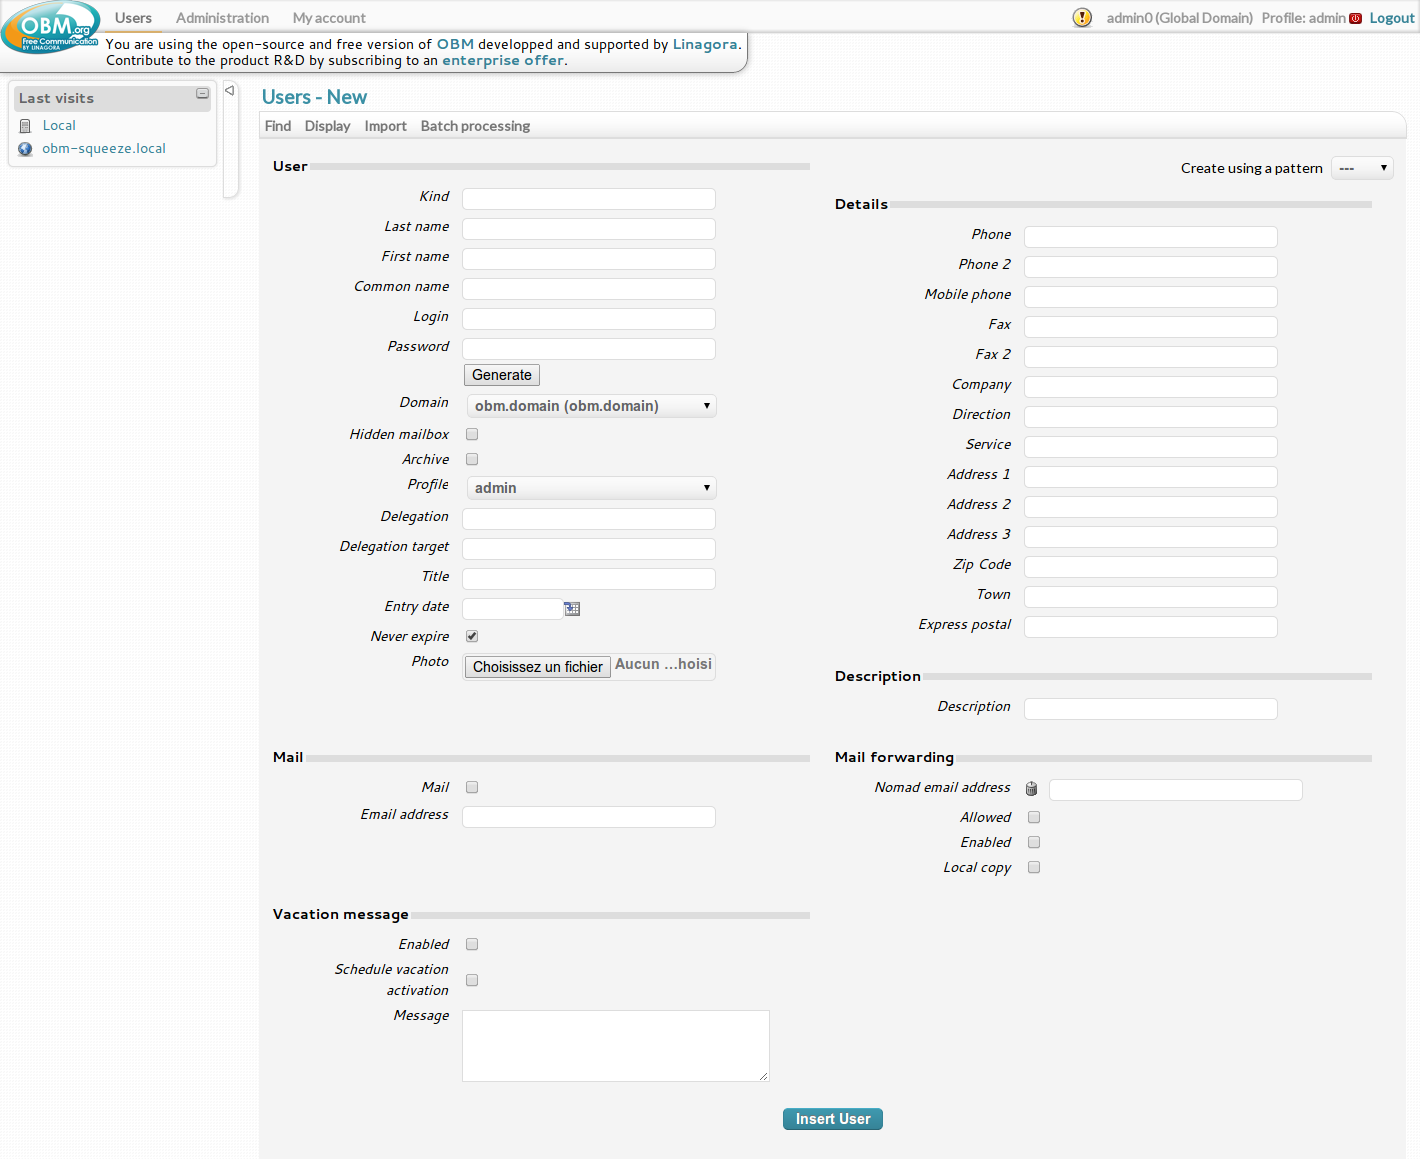
* Enter **Admin** in the *Last Name* field.
* Enter **admin** in the *Login* field.
* Choose a password and enter in in the *Password* field or use the *Generate* button to generate one.
* Select **obm.domain** as the *Domain*.
* Select **admin** as the user *Profile*.
* Check the *Mail* check box in the *Mail* section.
* Enter **admin** as the email address. The complete email address will be admin@[domain name].
* Click *Insert User*.
### Apply the modifications
Now that you made various modifications to your configuration, you need to apply them it so that all OBM components are synchronized.
OBM warns you about a required update by displaying the "*Yellow Pill*", a round, yellow button with an exclamation mark (!) located in the top-right part of the screen.
* Click the *Yellow Pill*. You should see something like: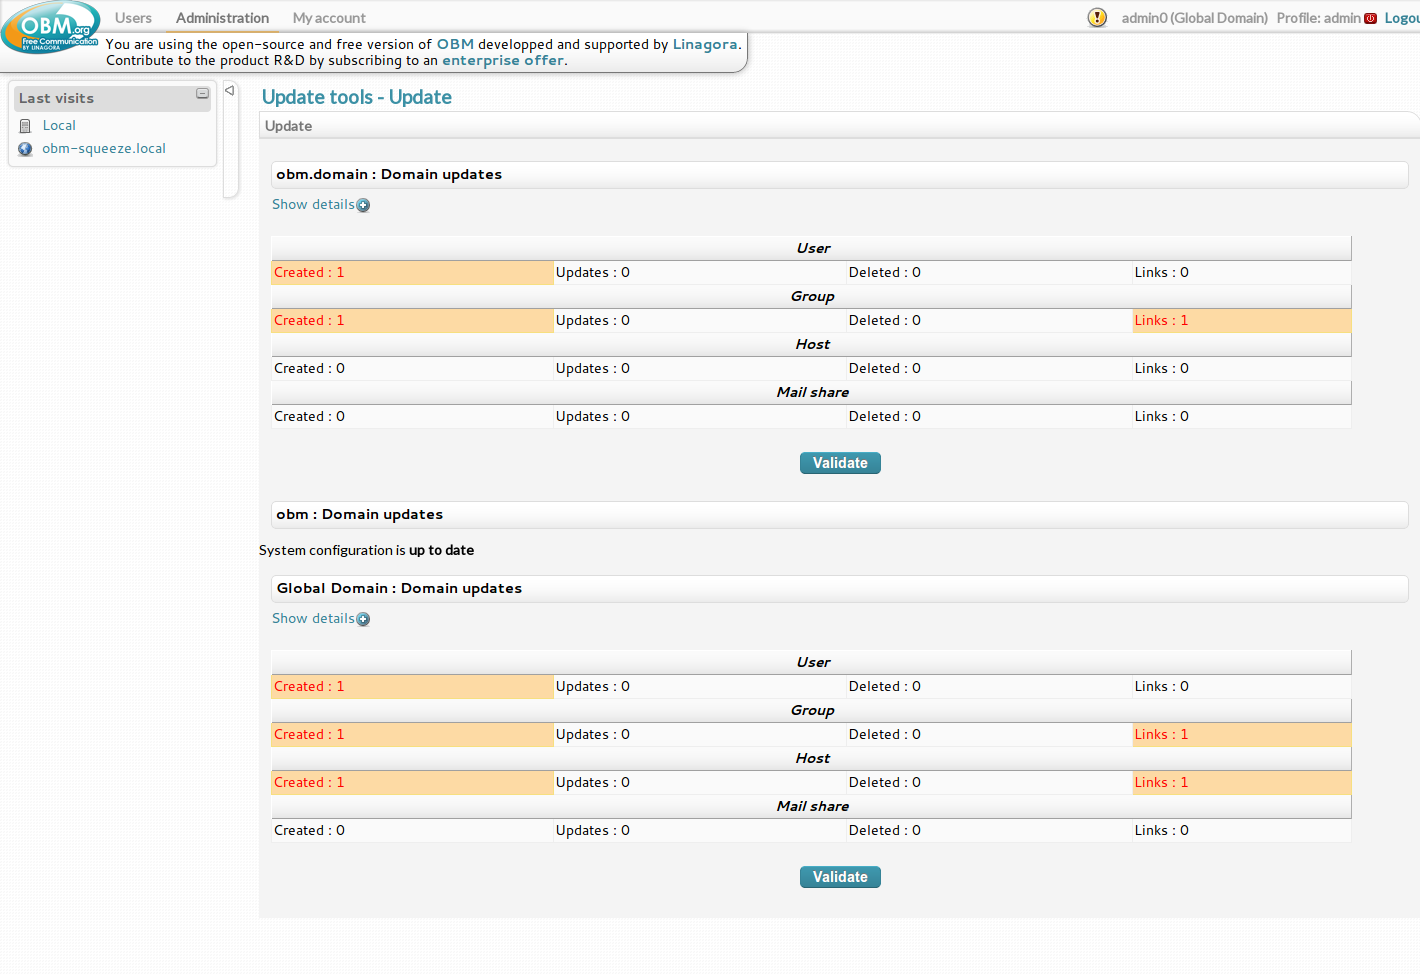
* Click the *Validate* button of the *Global Domain* section. Wait for the process to complete.
* Click the *Validate* button of the *obm.domain* section. Wait for the process to complete.
* Once the update is complete, you should come up with something like this: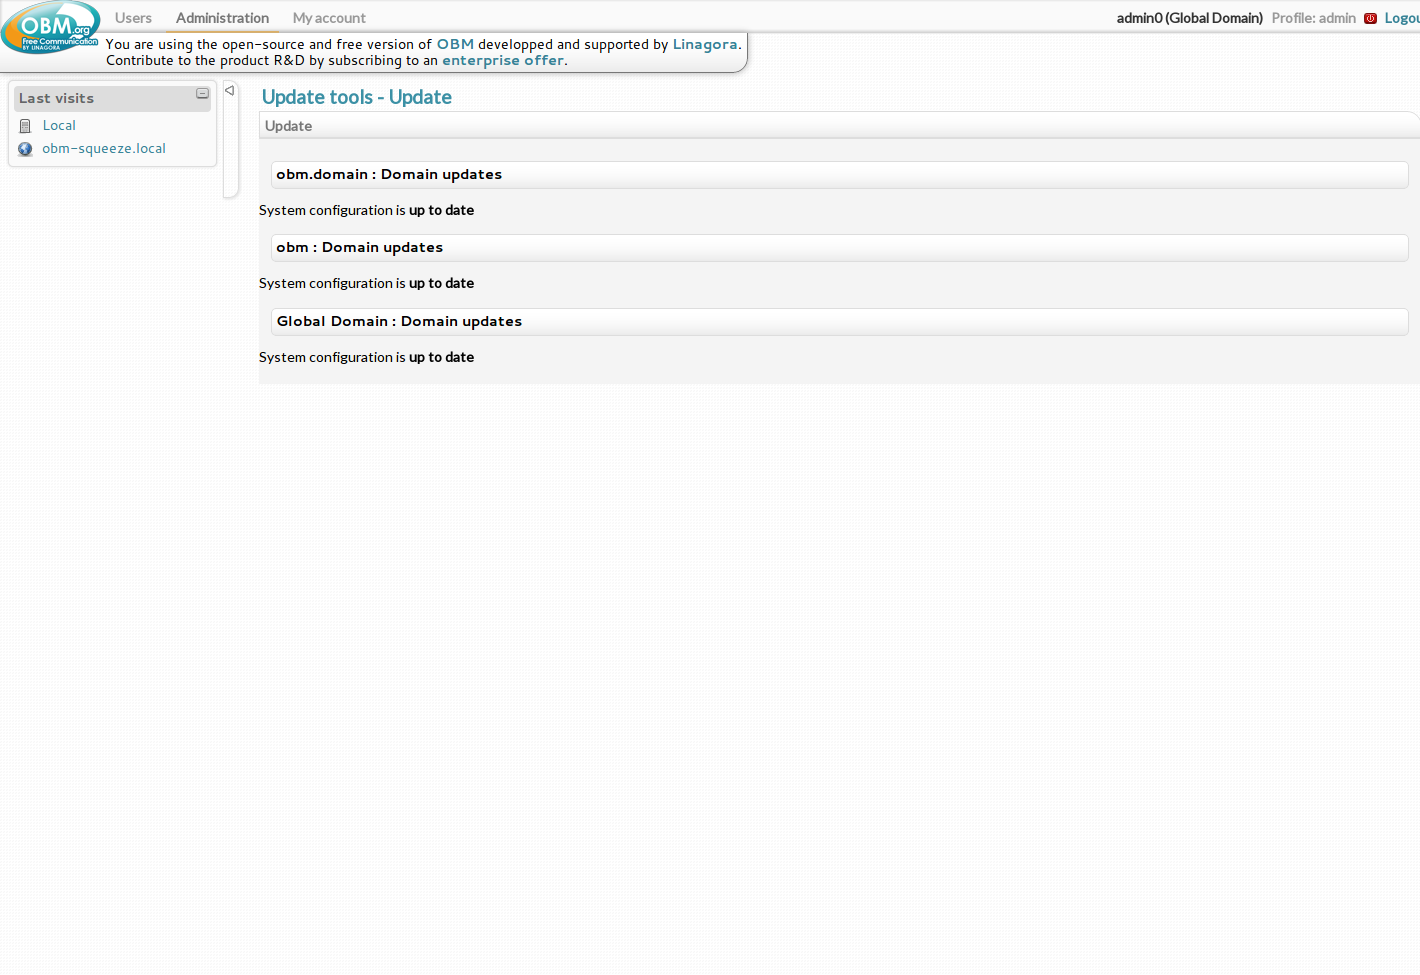
* Click *Logout* (the link is located in the profile menu, right part of the top menu bar) to end your session with the *admin0* user.
### Login with your newly created user
* You should be back to the front page.
* Enter login **admin**.
* Enter the password you chose.
* Make sure **obm.domain** is the selected *Domain*.
* Click *Submit* button
### Start a healthcheck
Since OBM 2.5, OBM got a Health Check system, which ensures that an OBM installation is operational. Please follow this documentation about the [healthcheck](obm-health-check-system).
Congratulations, you're now ready to use OBM!Boots